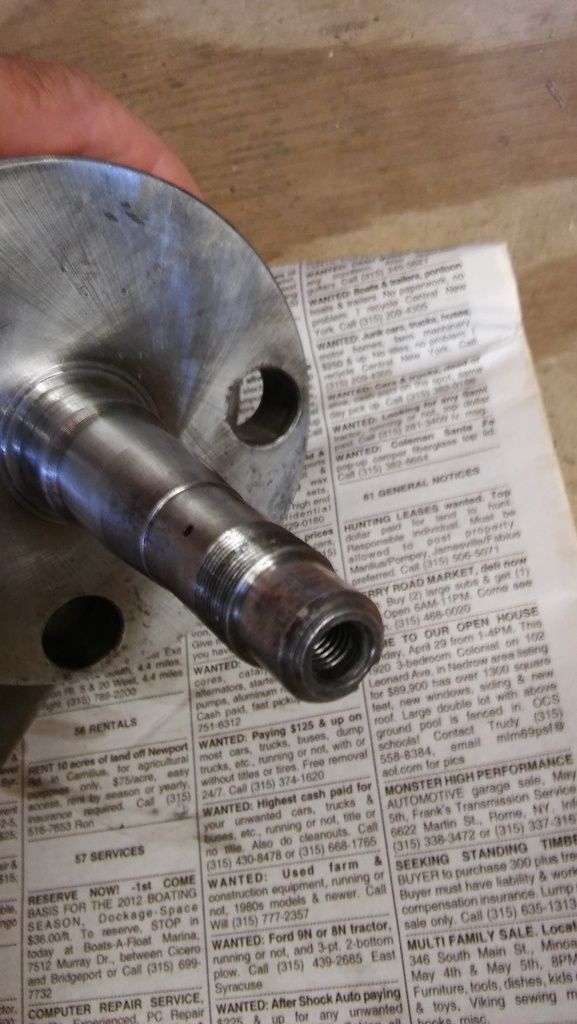
Snakeoil wrote: Now, as promised, here is surprise No. 1. I'll preface this with Lance was a BSA, Triumph, Ducati, Guzzi, CZ, Moto Beta, Norton, Mustang and Rickman dealer for over 45 years. When I showed him this, he said it was a first for him.
New 250 Project Adventure
Moderator: ajleone
-
Ventodue
- Posts: 960
- Joined: Mon Mar 08, 2010 3:23 pm
- Location: Montpellier, France
Re: New 250 Project Adventure
-
Snakeoil
- Posts: 109
- Joined: Fri Jun 17, 2016 12:10 pm
- Location: Upstate NY
Re: New 250 Project Adventure
Imagine how long and hard the mechanic looked for that wrench.
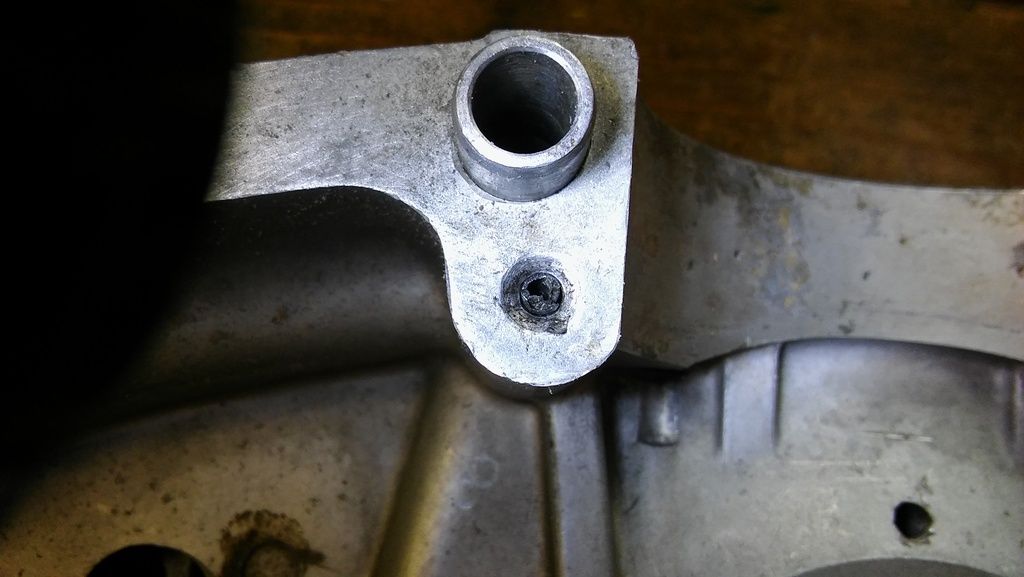
Today was not as productive as I had hoped. Gave the cases a good cleaning. The crud inside and out was worse than it looked. With that done, put the cases in the oven to remove the bearings. All went well until I realized that the tranny bearing with the clutch pushrod seal behind it was not a simple removal. Unpeened and removed the seal and its retainer. Found a socket that fit thru the hole in the case but not thru the inner race and gave it a few good taps with the case hot. To my dismay, a portion of the step that positions the seal broke. I know it was my fault. Working in hot, humid weather makes me rush and I paid the price. Here's the damage.
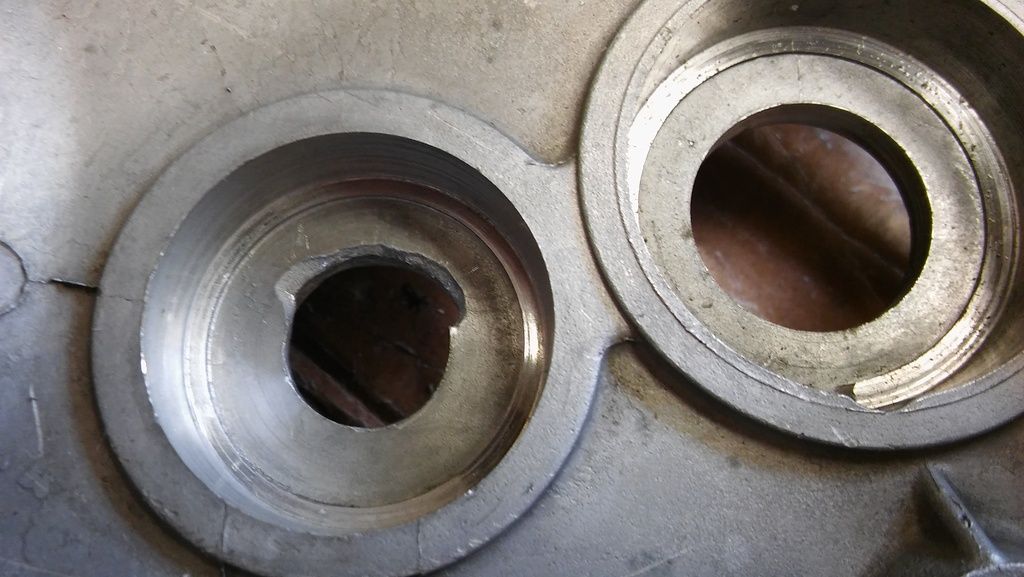
I'm very annoyed with myself. But crying over spilled milk is a waste of energy. Stared at the damage for about 20 minutes, walked away and stared at it some more. Welding it up is possible, but case warpage could ensue and that's just not good. Thought about making a thin backing shim since it just has to position and seal the rubber disc. But not crazy about that either. So, final decision was JB Weld the area.
Made a stepped plug to fit the ID of the thru-hole snugly and also fit the ID of the seal hole. Made it from PVC pipe. Put a half dozen coats of wax on it (aka mold release) and put it in place and held it there with a hunk of duct tape.
Here's the plug.

Here it is in place.
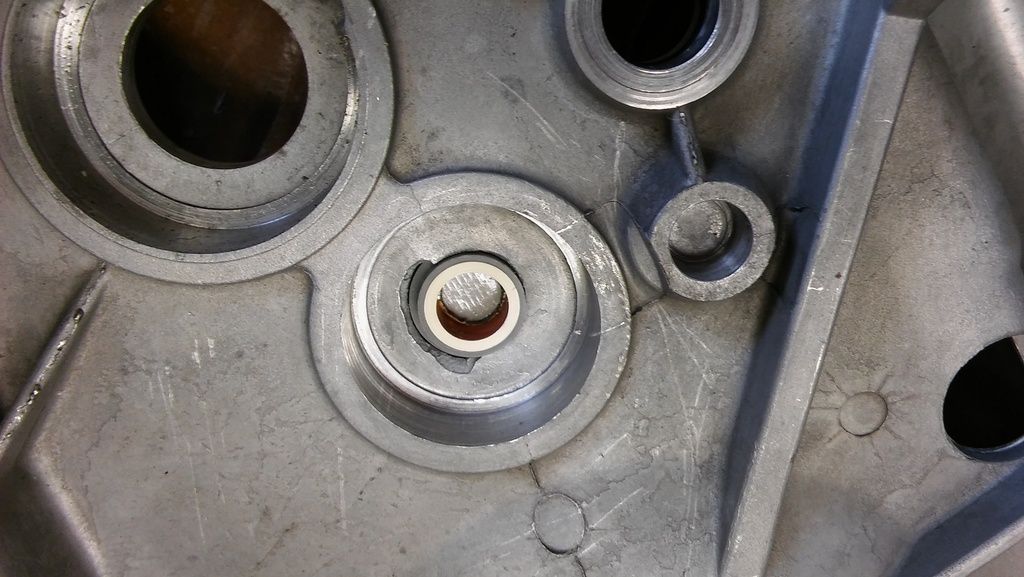
With the plug in place, mixed up a batch of standard cure (highest strength) JB Weld and filled the void.
While I was at it, I moved the upset and cracked metal with a hammer and punch, from the left case (reported earlier) and put a JB Weld patch over it on the inside. This damage was not structural so this is a better repair than a weld as no distortion takes place. I'll just blend and polish the outside which is just dented a bit. Less after reshaping it with the punch.
Here's the patch. Nothing fancy here.
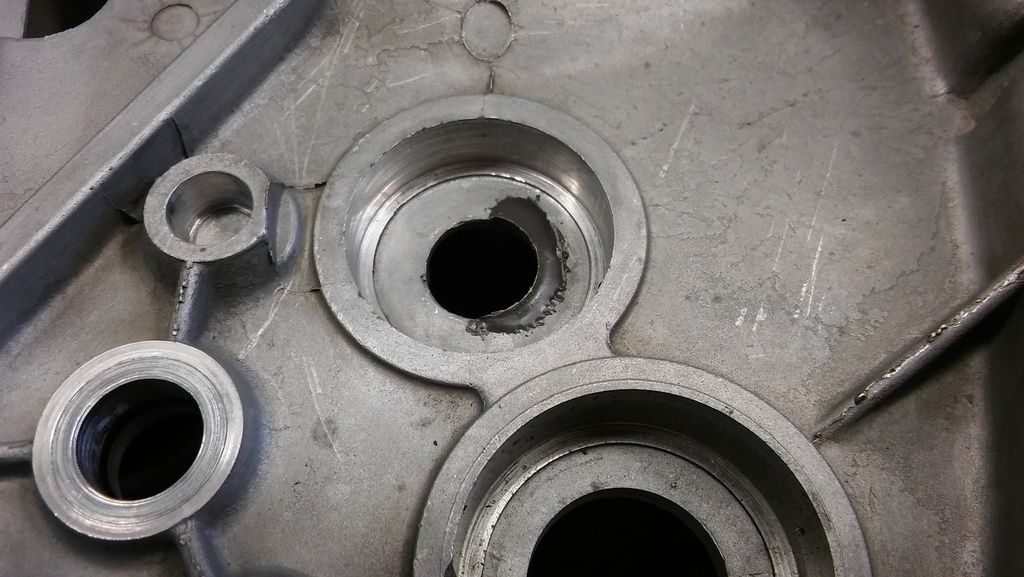
With that done, I inspected the other case and found more silicone in a bad spot. I believe this is a oil feed to the top end. As you can see, it was nicely restricted.
Here is what came out.

Blew it out with compressed air and passage is clear now.
Chased all the 6mm tapped holes with a bolt and found one with bad threads. Top 3 threads simply fell out as I cleaned the hole of silicone with a dental pick. I can Helicoil it or there may be enough threads remaining that it will still be more than adequate. 6mm bolt only requires 6mm of thread length for full strength.
That's it for now.
Rob
Today was not as productive as I had hoped. Gave the cases a good cleaning. The crud inside and out was worse than it looked. With that done, put the cases in the oven to remove the bearings. All went well until I realized that the tranny bearing with the clutch pushrod seal behind it was not a simple removal. Unpeened and removed the seal and its retainer. Found a socket that fit thru the hole in the case but not thru the inner race and gave it a few good taps with the case hot. To my dismay, a portion of the step that positions the seal broke. I know it was my fault. Working in hot, humid weather makes me rush and I paid the price. Here's the damage.

I'm very annoyed with myself. But crying over spilled milk is a waste of energy. Stared at the damage for about 20 minutes, walked away and stared at it some more. Welding it up is possible, but case warpage could ensue and that's just not good. Thought about making a thin backing shim since it just has to position and seal the rubber disc. But not crazy about that either. So, final decision was JB Weld the area.
Made a stepped plug to fit the ID of the thru-hole snugly and also fit the ID of the seal hole. Made it from PVC pipe. Put a half dozen coats of wax on it (aka mold release) and put it in place and held it there with a hunk of duct tape.
Here's the plug.

Here it is in place.

With the plug in place, mixed up a batch of standard cure (highest strength) JB Weld and filled the void.

While I was at it, I moved the upset and cracked metal with a hammer and punch, from the left case (reported earlier) and put a JB Weld patch over it on the inside. This damage was not structural so this is a better repair than a weld as no distortion takes place. I'll just blend and polish the outside which is just dented a bit. Less after reshaping it with the punch.
Here's the patch. Nothing fancy here.

With that done, I inspected the other case and found more silicone in a bad spot. I believe this is a oil feed to the top end. As you can see, it was nicely restricted.

Here is what came out.

Blew it out with compressed air and passage is clear now.
Chased all the 6mm tapped holes with a bolt and found one with bad threads. Top 3 threads simply fell out as I cleaned the hole of silicone with a dental pick. I can Helicoil it or there may be enough threads remaining that it will still be more than adequate. 6mm bolt only requires 6mm of thread length for full strength.
That's it for now.
Rob
-
CaptonZap
- Posts: 27
- Joined: Sun Jan 17, 2016 3:04 pm
Re: New 250 Project Adventure
Looks like you are of the right mind set for this sort of stuff.
My personal opinion is that the bearing problem wouldn't require any "fix" since if the bearing was a sealed type, the loss of metal would not affect it's sealing, and if it were an unsealed type, so what, just another place for the oil to get to the balls. The outer race seat is still usable, so that is the primary consideration
As for the case crack, I did the same thing to a Honda XR 500 case years ago, but being young and in a hurry, I applied the JB to the out side of the cover. It still keeps the oil in. Inside application hides what some might consider a "Bodge", and might save your reputation as a competent mechanic.
I have done the inside application to a BSA primary cover, so if yours fails, please let me know, so that I can consider another method of repair, or better preparation of the surface. Some say that oil or gas is deleterious to JB weld. The maker says that it is good to 300 deg F, so temperature should not be an issue.
90% of functional deficiencies are due to operator error. Especially with epoxy repairs.
Thanks for the pictures and commentary, it is instructional.
CZ
-
Ventodue
- Posts: 960
- Joined: Mon Mar 08, 2010 3:23 pm
- Location: Montpellier, France
Re: New 250 Project Adventure
Good call, good repair - and you can claim you're following in Ducati (and Laverda) tradition! Using epoxy to seal porous cases was standard practice at the time.
Your silicone pictures should be tatooed on the forehead of all mechanics who use instant gasket instead of ordering the right thing ...
Your silicone pictures should be tatooed on the forehead of all mechanics who use instant gasket instead of ordering the right thing ...
-
Jordan
- Posts: 1506
- Joined: Fri Dec 24, 2010 11:29 am
Re: New 250 Project Adventure
In retrospect, maybe a blind bearing puller would have been better than pressing from the pushrod seal side.
Something I've done: A rough and ready, but also fairly safe method is to weld the head of a long bolt directly to the inner race, and use it as a slide hammer shaft. It should be about 200 mm long minimum - longer is better. Obviously, the bearing and the bolt are destroyed in the process. Allthread rod might work too, if a tube is placed over it for the hammer weight to slide on.
The alloy case gets hot, and this helps as it expands more than the bearing.
-
Snakeoil
- Posts: 109
- Joined: Fri Jun 17, 2016 12:10 pm
- Location: Upstate NY
Re: New 250 Project Adventure
Appreciate the comments, which were kind to boot. The bearing is shielded on one side. So you are right that not much oil would get thru. I'll probably replace it with a sealed bearing on the case side. The pushrod seal is a second sealing system to avoid oil exiting the case in the sprocket area.
Agree that a puller would have been safer. But going thru the back would have been fine if I had taken my time and thought about it a bit more. Every so often I need a smack in the face to get me to slow down and think twice before I do something.
Regarding JB Weld. I should hold up fine in an oil environment provided the surface was properly prepped. I have run tests with pure ethanol and E10 gasoline and it does soften a bit. I'd say it gets rubbery. But if you remove it from the liquid it rehardens. So, obviously ethanol does attack it. How much is unknown by me. I simply tested a sample and did not test adhesion properties with the E10. I did not check the label on the new package of JB Weld. But it used to say it was good for repairing leaking gas tanks. Not sure that is true any longer with E10 out there.
My welders are all at home. I probably should get one for the camp. I already have two of everything including two lathes. It's a bit out of control. It has happened over time because of having two places. We are talking about relocating South to ONE STINKIN' HOUSE. Then I can unload some of my extras. Gonna have one heluva garage sale if it ever happens.
regards,
Rob
-
Eldert
- Posts: 830
- Joined: Sun Nov 01, 2009 3:23 pm
- Location: Hazerswoude Rijndijk Netherlands
Re: New 250 Project Adventure
Hi Rob
the fixed first gear has a small hole in it to lubricate the clutch pushrod that is why the seal is there .
Eldert
the fixed first gear has a small hole in it to lubricate the clutch pushrod that is why the seal is there .
Eldert
-
double diamond
- Posts: 557
- Joined: Thu Apr 28, 2011 1:20 am
Re: New 250 Project Adventure
Cringe to think what the head must have suffered with the oil passage plugged...
Mat
Mat
-
Snakeoil
- Posts: 109
- Joined: Fri Jun 17, 2016 12:10 pm
- Location: Upstate NY
Re: New 250 Project Adventure
Thanks Eldert. I'll look for that when I finally get around to inspecting.
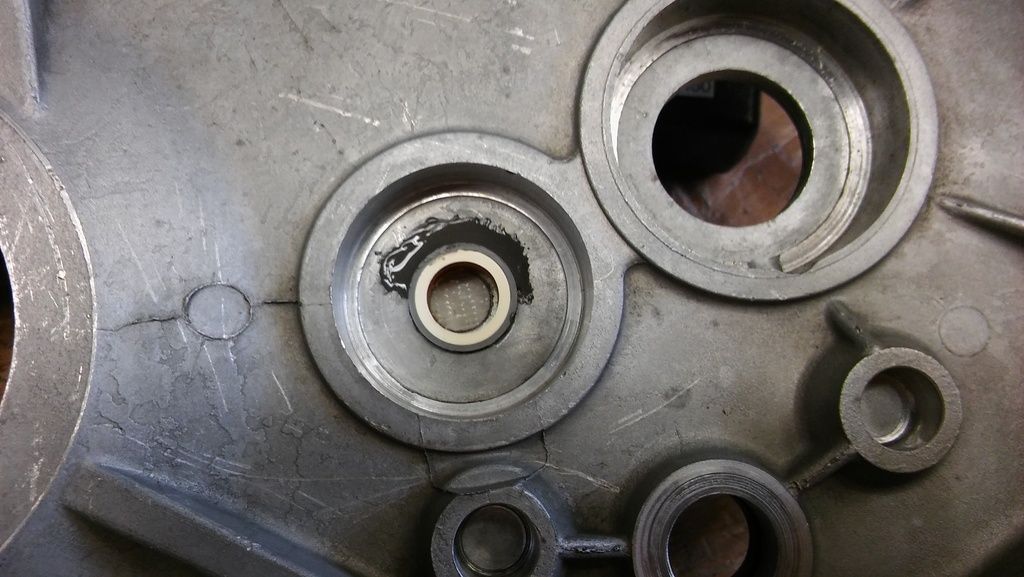
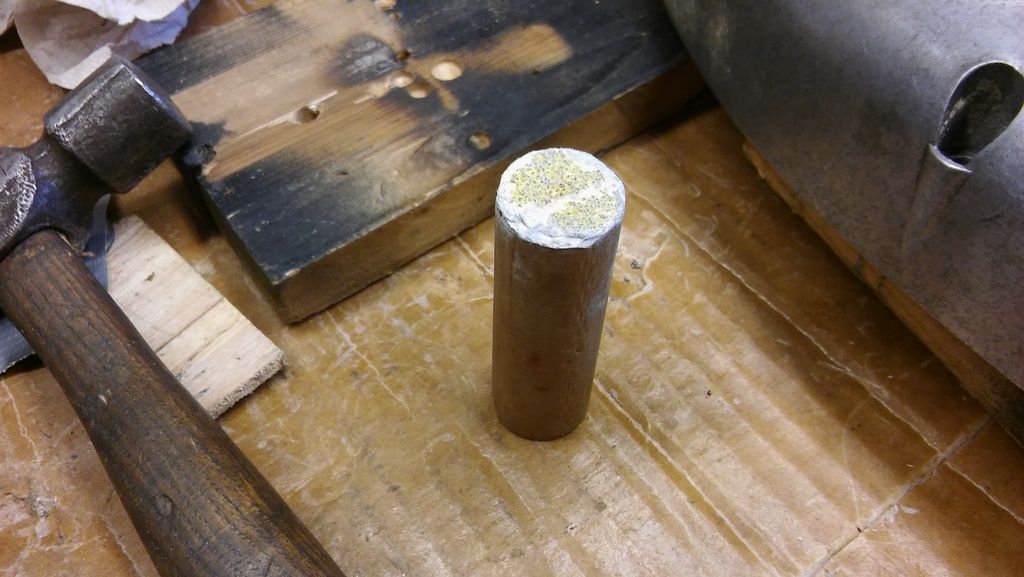
Epoxy dried and plug slipped out nicely with just a tap. Here is the epoxy hole with the plug out and no finishing.
Made a small tool to sand the raised epoxy down flush to the face of the shoulder.
Here is the finished repair.

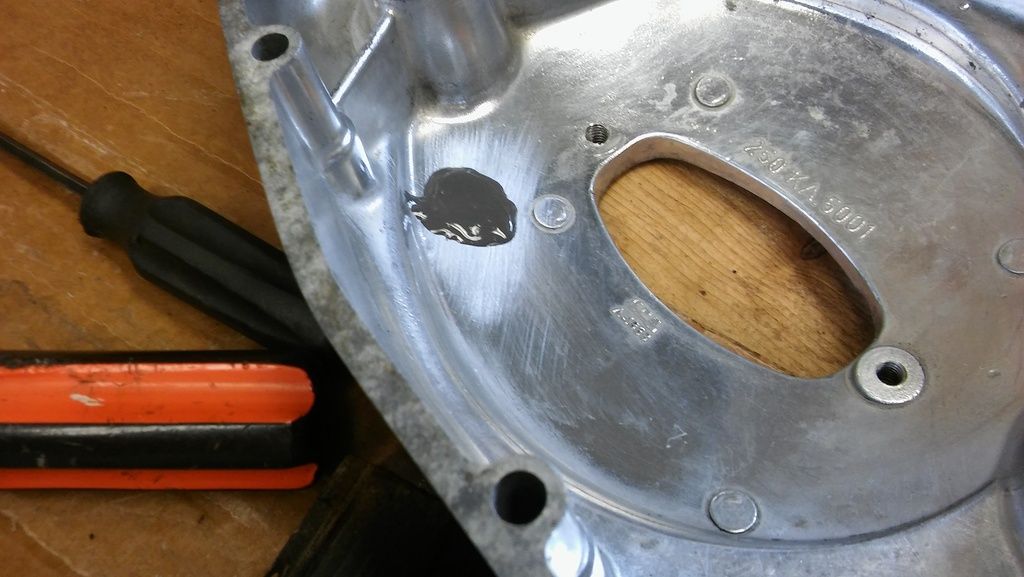
Decided to polish the primary cover where the brake pedal hit it. With a little sanding it became apparent that the cracks go thru the case. So the inside repair will prevent seepage down the road.

Next was cleaning out the sludge trap. I took my engine stand and tacked a couple of wheel chocks to hit so it would tilt upward. This would allow me to keep the trap hole down so no crud would move up into the oil passage. I also put an air purge on the end of the crank to push any debris that might pop up (it was all pretty hard) down and out thru the sludge trap opening.
Here's the set-up.

Here is my work view.
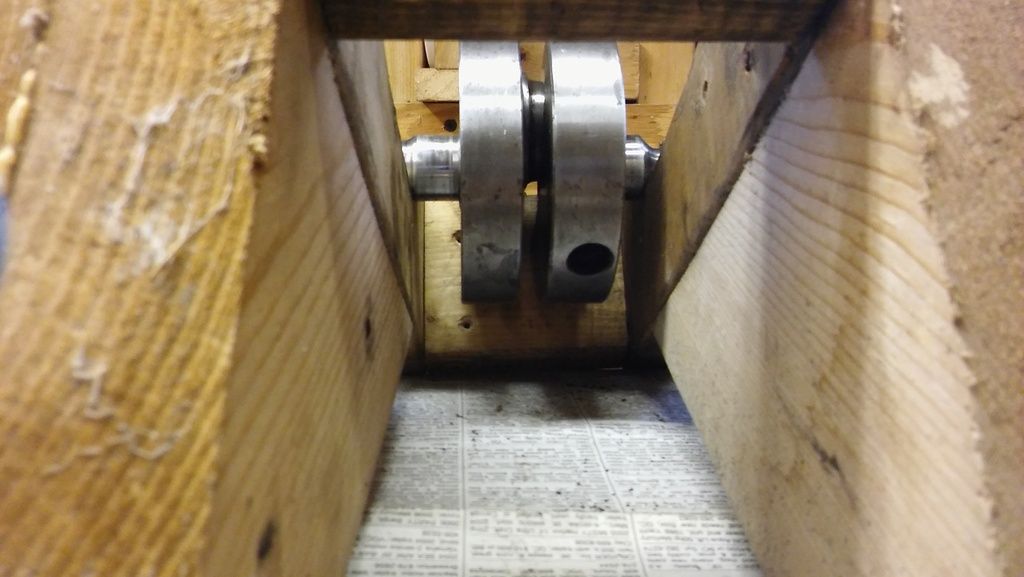
This is what it looked like under the crank after a few minutes of excavation.
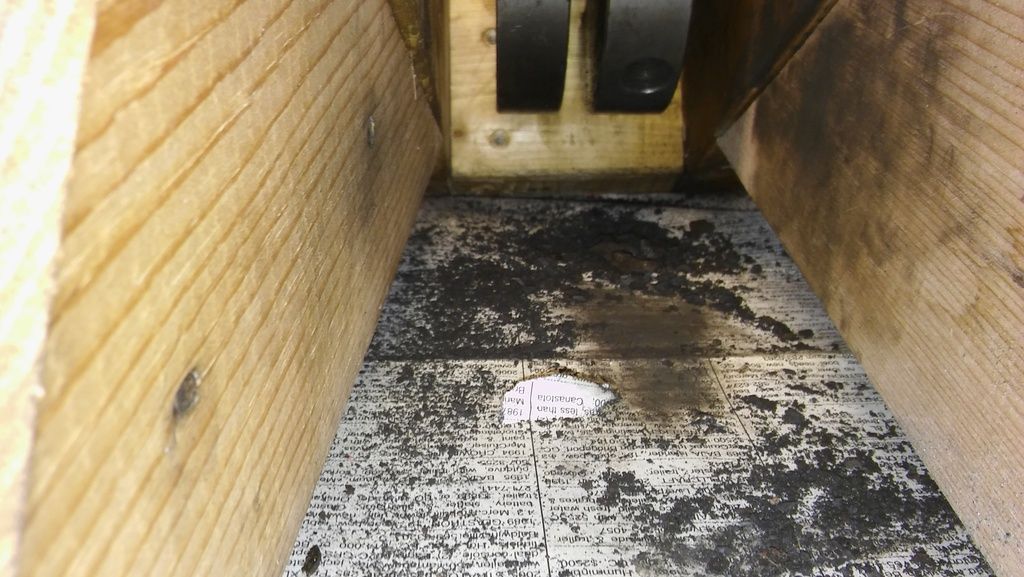
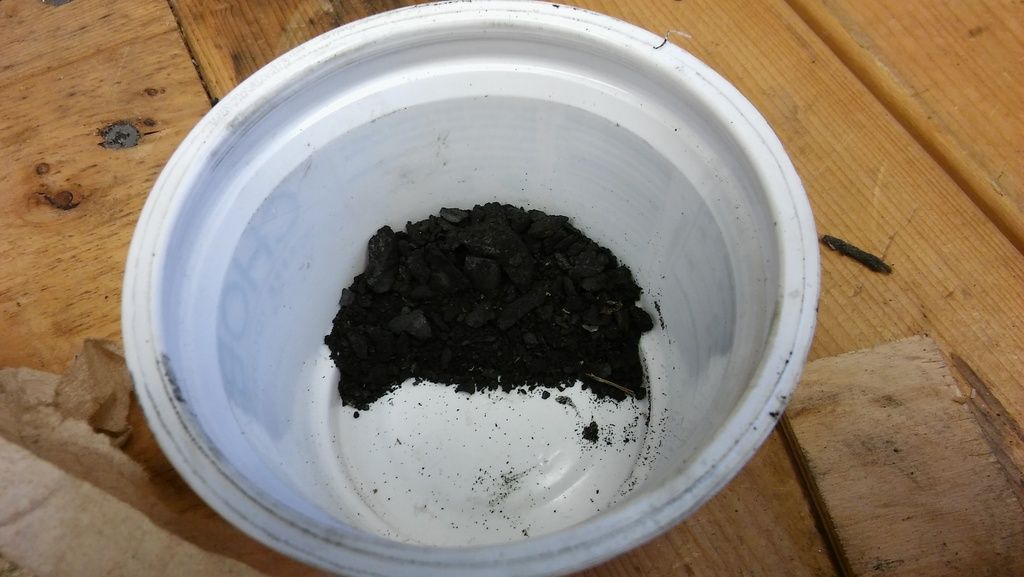
When it was cleaned out, I collected all the crud. The entire trap was full.
I also found that they have a tube pressed in so that it would be difficult for crud to move upward into the oil passage. Glad they were thinking.
Here is the cleaned out sludge trap. You can see the tube up inside that goes into the oil gallery.
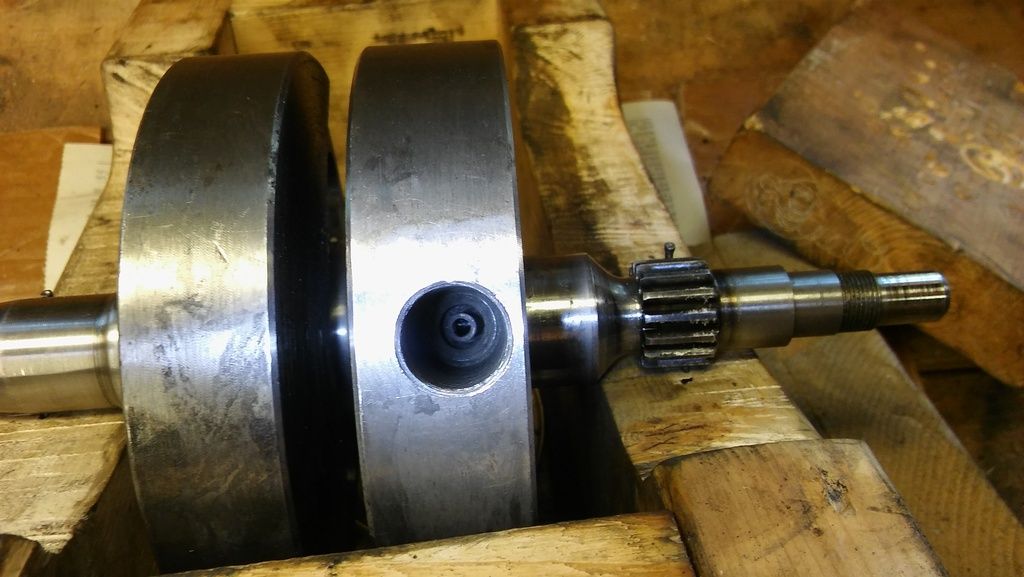
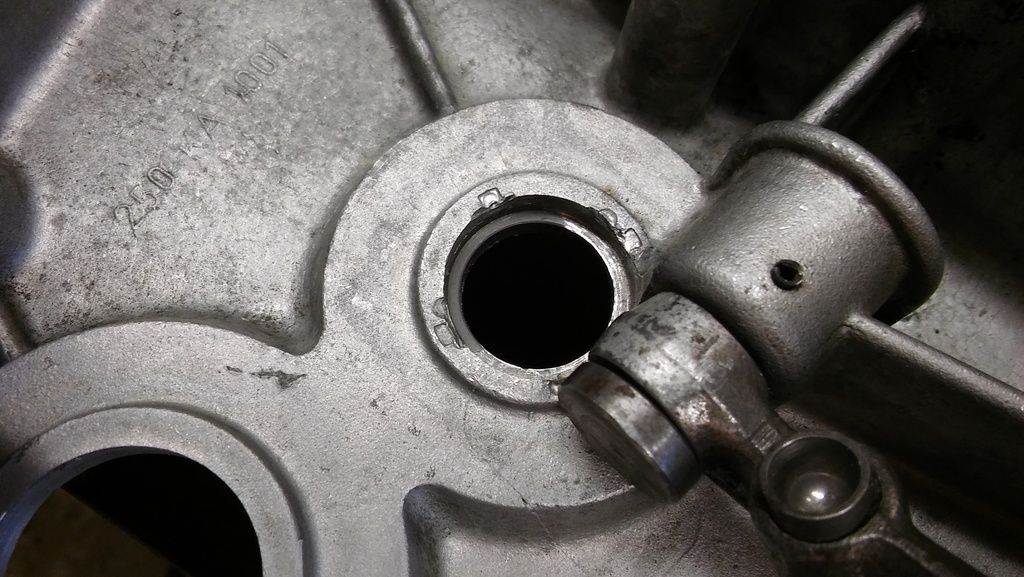
Now, I'll share a learning experience. After cleaning out the sludge trap, I noticed a screw on the alternator end of the crank. Obviously a plug. There is also a small radially drilled oil port on that end. So, I looked at the lube system diagram and saw that the oil flows from the other end of the crank thru to the big end and then thru the crank pin to the other cheek and down thru to the alternator shaft and out that radial port. When I removed the screw and poked a wire thru, it stopped. A light down the bore gave the impression that it was a blind hole. But this did not make sense. So, I check the diagram again. Went back out and put 120 psi on the oil feed on the end of the crank with the sludge plug in. Suddenly, air and crud came out the radial port and the end of the crank. So, I pumped min spirits in thru the oil feed end and then blew thru it with compressed air. It took many tries before the min spirits came out clean. Another look with a light reveal a nice clean oil gallery thru the bore of the alternator shaft.
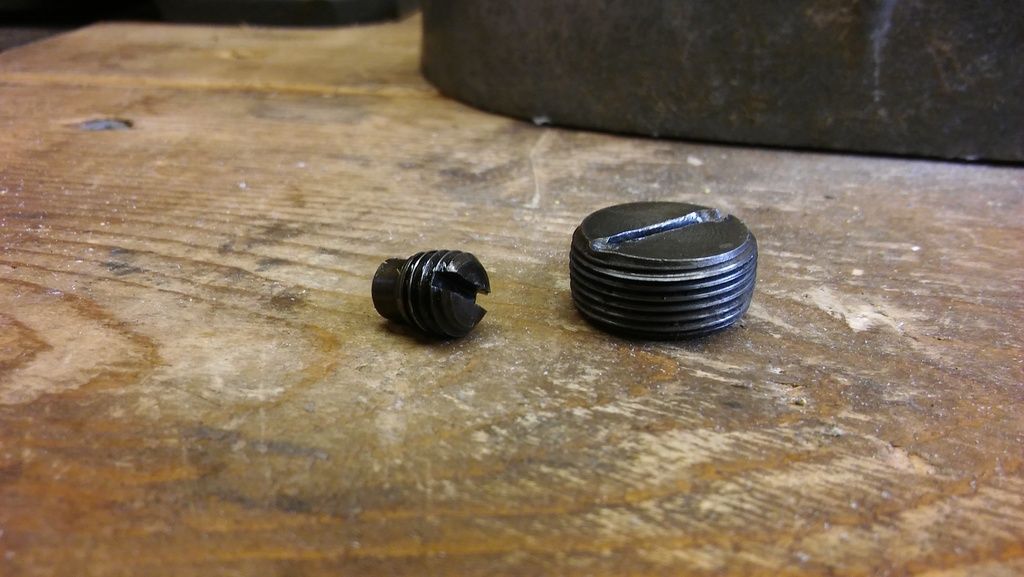
Here is a shot of the threaded end of the alternator shaft.
This is the plug that goes into that threaded end next to the sludge trap plug.
I pumped quite a bit more min spirits thru the crank and moved the rod while doing so. Idea was to thoroughly flush out the bearing. Eventually, everything was clean and the big end bearing felt perfect. I blew it dry with compressed air and set the crank in the sun while I cleaned up the mess on my bench.
As a sidenote, this is what I use to pump various fluids thru passages. It is called a Monoject. Dentists use them. My wife is a retired dental assistant and everytime they cleaned out the office, she brought home all the good stuff to me.
These are very handy.
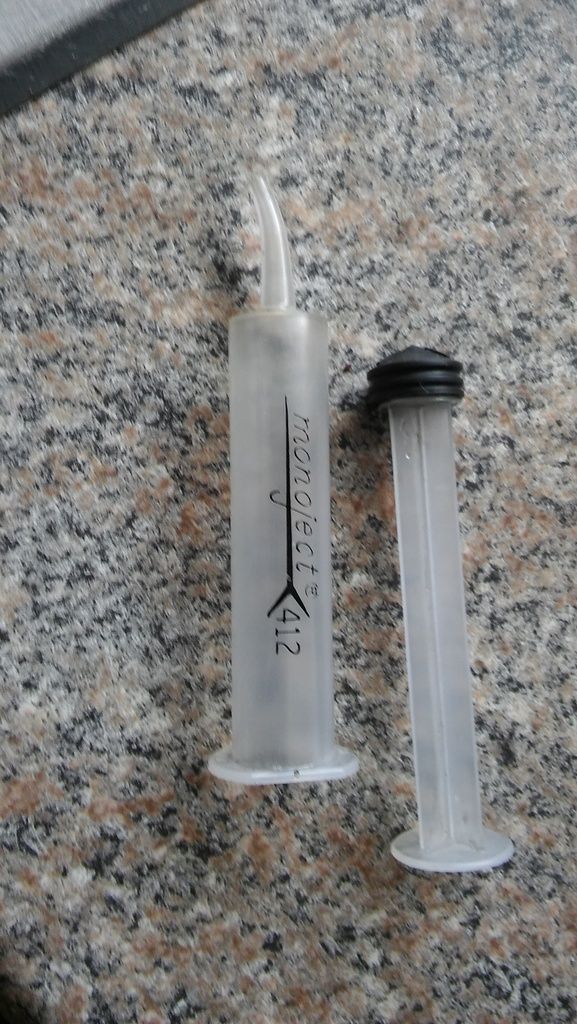
Just have to remember to wash them immediately after use. Rubber seal is not intended for solvents and such and will swell.
When the crank was dry, I pumped fresh 40 wt oil thru the feed hole until it came out of the big end and the opposite end of the crank. Blew the oil thru with compressed air. Did this several times. Then cleaned the threads on the sludge trap and the alternator shaft and installed the plugs. Used blue Loctite on the sludge trap plug in addition to staking the plug. Blew thru it again with compressed air, rubbed oil on the rest of the crank and put it in a plastic bag until it goes back into the engine.
Based on what I found, that small port could get blocked if oil is not changed. There is no centrifugal force to pack dirt into the end of the crank. But since it is a dead head with just the port for relief, it could get plugged. It appears mine was plugged solid.
regards,
Rob
Epoxy dried and plug slipped out nicely with just a tap. Here is the epoxy hole with the plug out and no finishing.


Made a small tool to sand the raised epoxy down flush to the face of the shoulder.

Here is the finished repair.

Decided to polish the primary cover where the brake pedal hit it. With a little sanding it became apparent that the cracks go thru the case. So the inside repair will prevent seepage down the road.

Next was cleaning out the sludge trap. I took my engine stand and tacked a couple of wheel chocks to hit so it would tilt upward. This would allow me to keep the trap hole down so no crud would move up into the oil passage. I also put an air purge on the end of the crank to push any debris that might pop up (it was all pretty hard) down and out thru the sludge trap opening.
Here's the set-up.

Here is my work view.

This is what it looked like under the crank after a few minutes of excavation.

When it was cleaned out, I collected all the crud. The entire trap was full.

I also found that they have a tube pressed in so that it would be difficult for crud to move upward into the oil passage. Glad they were thinking.
Here is the cleaned out sludge trap. You can see the tube up inside that goes into the oil gallery.

Now, I'll share a learning experience. After cleaning out the sludge trap, I noticed a screw on the alternator end of the crank. Obviously a plug. There is also a small radially drilled oil port on that end. So, I looked at the lube system diagram and saw that the oil flows from the other end of the crank thru to the big end and then thru the crank pin to the other cheek and down thru to the alternator shaft and out that radial port. When I removed the screw and poked a wire thru, it stopped. A light down the bore gave the impression that it was a blind hole. But this did not make sense. So, I check the diagram again. Went back out and put 120 psi on the oil feed on the end of the crank with the sludge plug in. Suddenly, air and crud came out the radial port and the end of the crank. So, I pumped min spirits in thru the oil feed end and then blew thru it with compressed air. It took many tries before the min spirits came out clean. Another look with a light reveal a nice clean oil gallery thru the bore of the alternator shaft.
Here is a shot of the threaded end of the alternator shaft.

This is the plug that goes into that threaded end next to the sludge trap plug.

I pumped quite a bit more min spirits thru the crank and moved the rod while doing so. Idea was to thoroughly flush out the bearing. Eventually, everything was clean and the big end bearing felt perfect. I blew it dry with compressed air and set the crank in the sun while I cleaned up the mess on my bench.
As a sidenote, this is what I use to pump various fluids thru passages. It is called a Monoject. Dentists use them. My wife is a retired dental assistant and everytime they cleaned out the office, she brought home all the good stuff to me.
These are very handy.

Just have to remember to wash them immediately after use. Rubber seal is not intended for solvents and such and will swell.
When the crank was dry, I pumped fresh 40 wt oil thru the feed hole until it came out of the big end and the opposite end of the crank. Blew the oil thru with compressed air. Did this several times. Then cleaned the threads on the sludge trap and the alternator shaft and installed the plugs. Used blue Loctite on the sludge trap plug in addition to staking the plug. Blew thru it again with compressed air, rubbed oil on the rest of the crank and put it in a plastic bag until it goes back into the engine.
Based on what I found, that small port could get blocked if oil is not changed. There is no centrifugal force to pack dirt into the end of the crank. But since it is a dead head with just the port for relief, it could get plugged. It appears mine was plugged solid.
regards,
Rob
-
Ventodue
- Posts: 960
- Joined: Mon Mar 08, 2010 3:23 pm
- Location: Montpellier, France
Re: New 250 Project Adventure
Good stuff, Rob. Thanks for posting.
Your experience with the sludge trap is very typical. The trap is, in fact, the principal system of oil filtration - and it's remarkably efficient! In the owner's manual for the 160 Monza, it's specified that the trap should be cleaned out ever 10,000 km. Which all owners did, and still do, religiously, of course ...
This service requirement was dropped by the the time the 250s appeared. I guess even Ducati realised there was no point advocating something that was never gonna happen ...
Return to “Ducati Singles Main Discussions (& How to Join)”
Who is online
Users browsing this forum: Google [Bot] and 27 guests