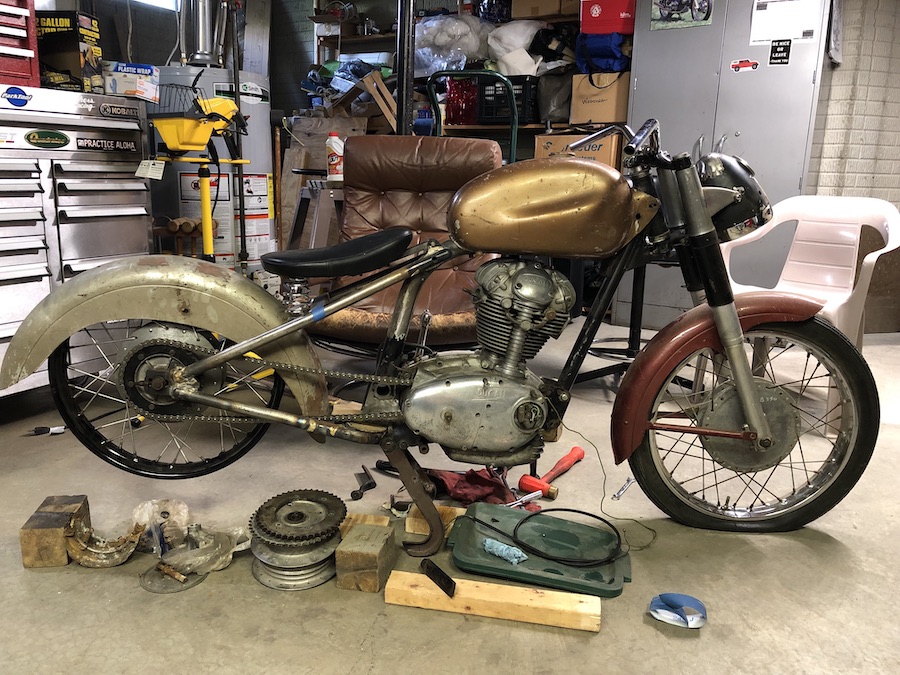
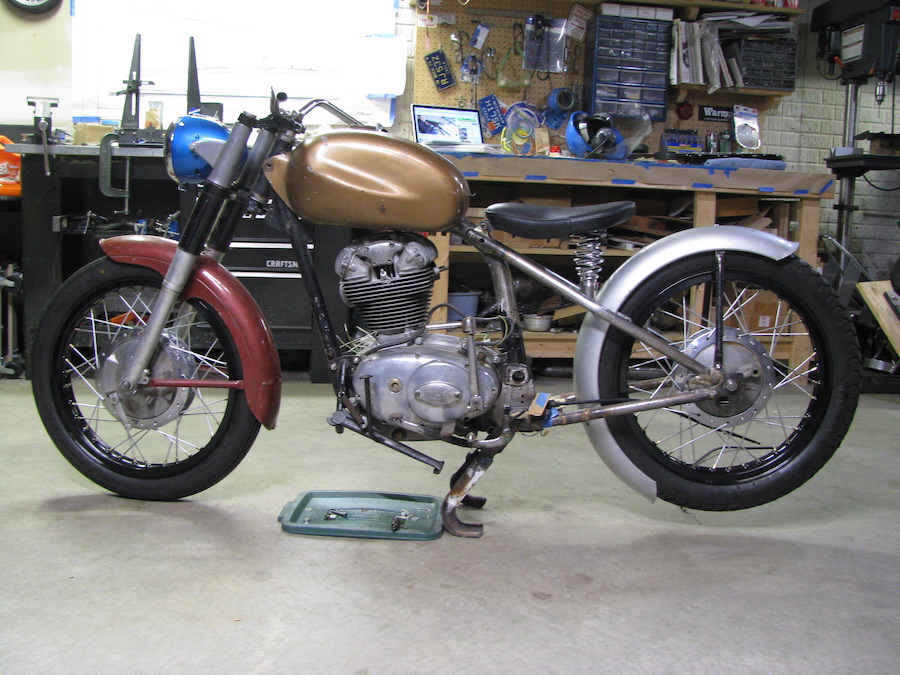
In looking at it there are a few things I'd do differently if I was starting on it now, but that's how this stuff works. The original idea was to buy as few parts as possible and use mostly what I had sitting around instead. Basically a side project with near zero cost. It's grown since then but I'll start from the begining.
Spoiler alert - This is going to cover the making of a hardtail Ducati. You've been warned.
And now that the purists are busy gathering their pitchforks and forming a mob I'll get on with it.
Back when the chopper craze was at it's height, when they had huge tires, huge engines, and huge prices, I used to joke about building a little bobber to be the antithesis of what all the cool kids were dropping big money on.
When I ended up with a spare engine I realized I had most of what I'd need to actually build one. So I posted a note on the bevelheads list to see if anyone had a neglected (aka CHEAP) frame they'd be willing to let go. The first reply I got was from a buddy who had a frame that fit the bill perfectly (aka FREE). Alrighty then, bluff called. Time to start building a Ducati bobber. (Thanks again, Rich!)
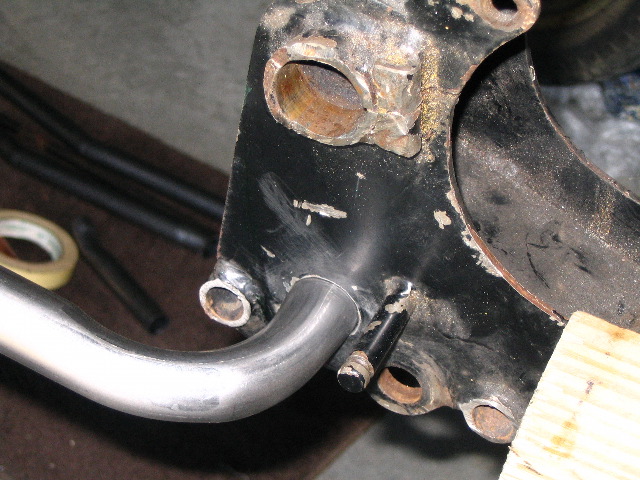
We met up at the Vintage Motorcycle Days at Mid-Ohio and I picked up the remains of a Ducati 160 frame that some complete hack had given him. The swingarm had been removed with a hacksaw, cutting into the pivot bosses in the process. The remains of the swingarm pivot was then removed from the frame with a sledge hammer. From what I can tell, the frame was laid down on the ground and beaten until the pivot was freed. And the subframe was bent. And the passenger peg mount was bent. And the pinch bolt bosses were crushed. And the serrated end of the footpeg mount was destroyed. They succeeded in removing the pivot but the frame was useless when they were done. Here are a couple bad photos of it as delivered.


No sane person would restore this frame back to stock. Maybe if it was a Vincent Black Lightning it'd be worth it, or some old boardtrack racer, but we're talking a square-styled Ducati 160 Monza Jr here. Out came the hacksaw and off came about 8 pounds of bent and battered tubing.

I've forgotten how I came up with the dimensions of the hardtail section. I probably I used a 250 narrowcase frame and swingarm I had, measured where I wanted everything to end up, and did the math. I bought the tubing from an online supplier, brought it in to work and manually bent it on a tubing bender. I didn't have a frame jig, so I drew a straight line on a tool stand I had and clamped the frame to it. Everything was centered and many measurements were taken when adding things. It's not a race bike, it'll be fine.
I ran the new chain stays out of the existing brackets with a 90 degree bend and ran them straight to the new axle plates. I used the hole that the rear brake arm pivot went through as a locator for the new frame tubes, enlarging them for the frame tubes to fit.

For the seat stays I decided to bolt them to the frame and then weld them too after everything was in place. Belt and suspenders, I know, but I don't see a downside. If I don't like how the bolt head looks, I'll grind it down to match the profile of the tube, braze over it, then smooth it all down so when it's painted no one will be able to tell it's there. The tabs are there to mount the pivot for a sprung seat. In hindsight this is one of the things I'd do differently, but I'm commited now.
Also, at this point of my life all I had was an oxy/acetylene welding set up so in the vintage style I tried bronze welding. It's not the prettiest but it's solid. I've wanted a TIG welder for ages but went with a MIG when I finally bought something. Still want a TIG... but hard to justify at this point in the game.


More later...