1966 160 Monza Jr re-style

Ducati single cylinder motorcycle questions and discussions, all models. Ducati single cylinder motorcycle-related content only! Email subscription available.
Moderator: Morpheus

Moderator: ajleone

DesmoDog
Posts: 166
Joined: Fri Nov 06, 2009 12:36 am

1966 160 Monza Jr re-style

Postby DesmoDog » Wed Nov 25, 2009 4:21 am

I put this build thread over on the adventure riders forum but thought maybe it would fit over here better, so... forgive me for the repost as it were. Hopefully it fits with the "spirit" of this site even if it isn't an exclusive.

*************************
Most of the work shown here happened a few year ago but this bike isn't on the road yet, I've still got a lot of work to do before it'll be ready to ride. I started working on it a few years ago and then got sidetracked. It's been dormant for over a year but I'm hoping to change that soon.

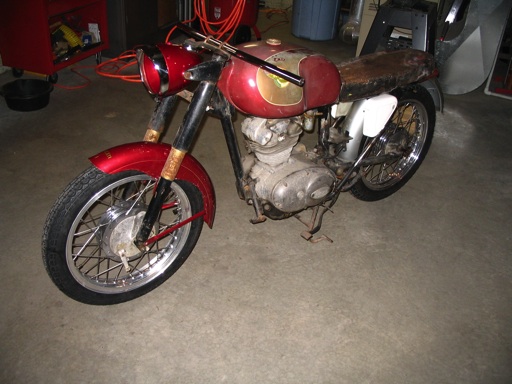
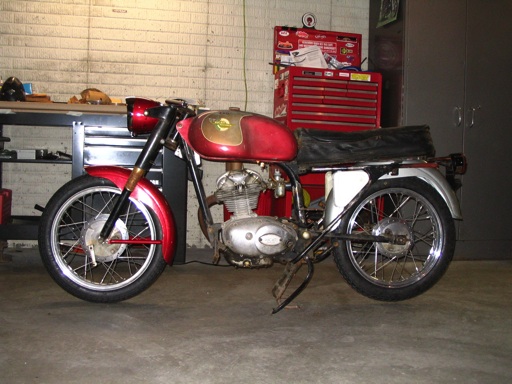
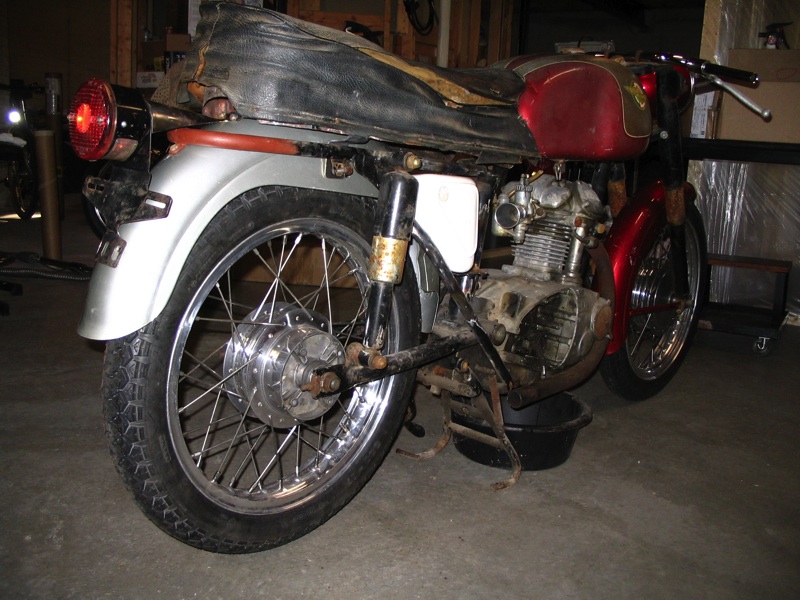
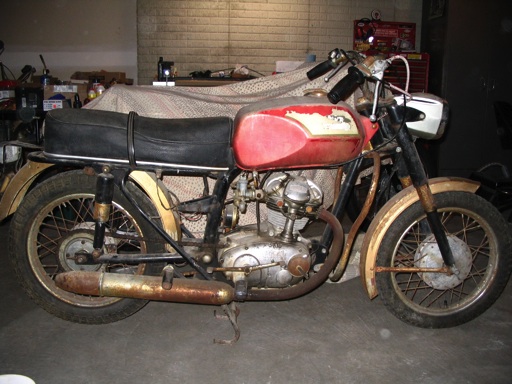
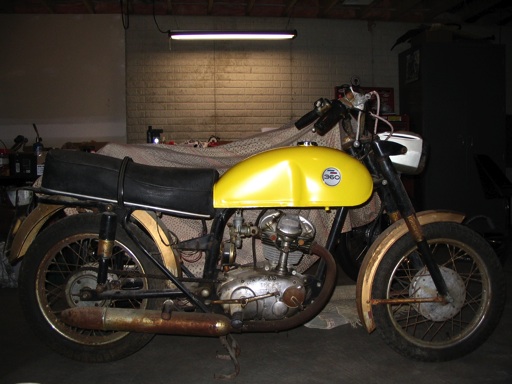
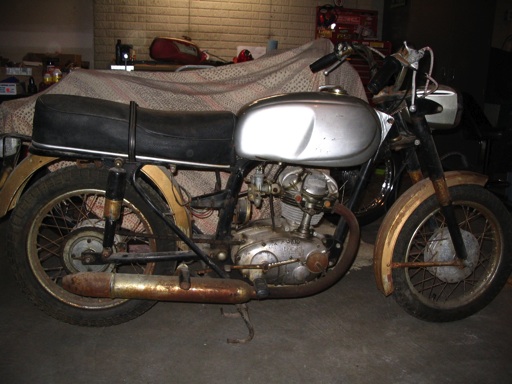
The project began when I got a 1966 160 Monza Jr as part of a package deal with a '66 250 Monza, which was the bike I was really looking for. Pictures of the 160 from the ad;
Image

Image

It was a ratty bike to be sure, but the parts it was missing were all things I would have replaced anyway - it looked like it could be a fun project. The 250 was in about the same condition. When I saw the bikes I was sure I'd leave with the 250 but the 160 depended on the deal I could get. I made an offer for both (all the cash I had brought with me!), the seller accepted, and I took them home. Before I left the house that morning I had told my wife I was going to look at a bike. She didn't notice I had set the trailer up for two bikes the night before. I called to tell her the news when I was half way home... she's very understanding!

Image

Image

Image

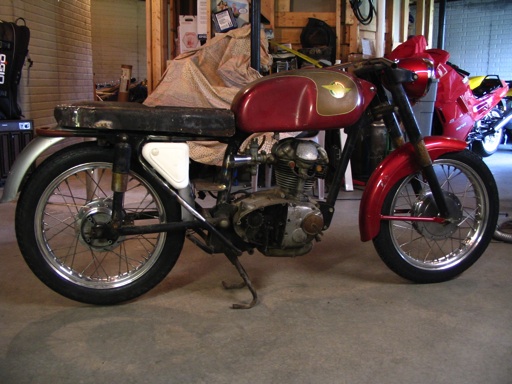
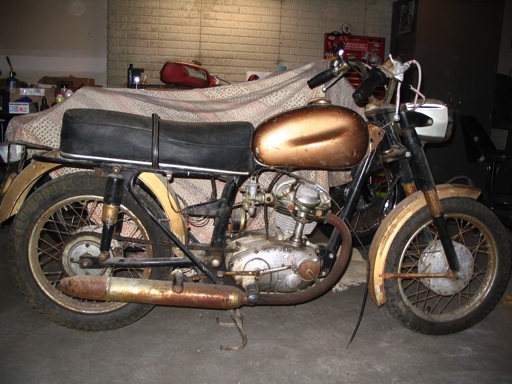
I wasn't sure what I was going to do with the 160, but figured I'd come up with something while I was working on the 250. I was finishing up a non-single cylinder bike when I got them so they sat for a while and about all I did was gather parts. For some reason I put the tanks I was considering for the 250 onto the 160.

Stock Monza tank
Image

An older Monza tank
Image

A Benelli Mojave tank
Image

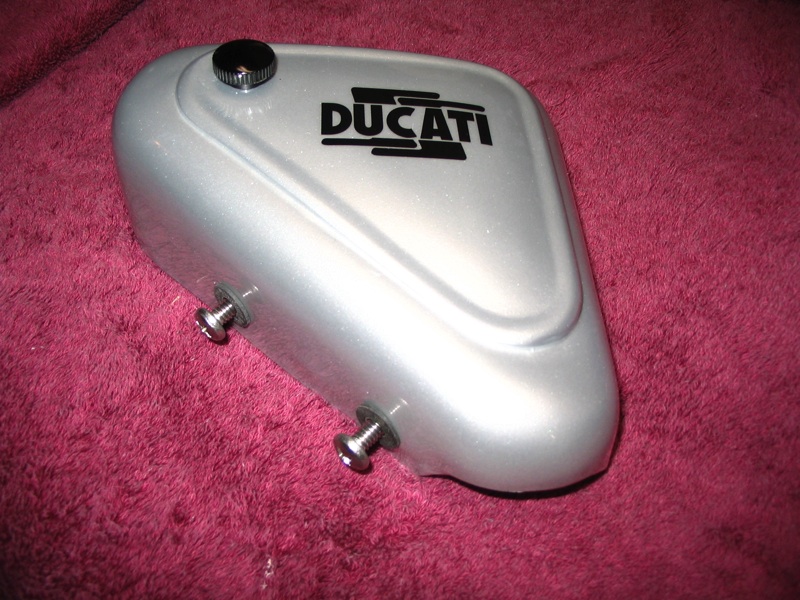
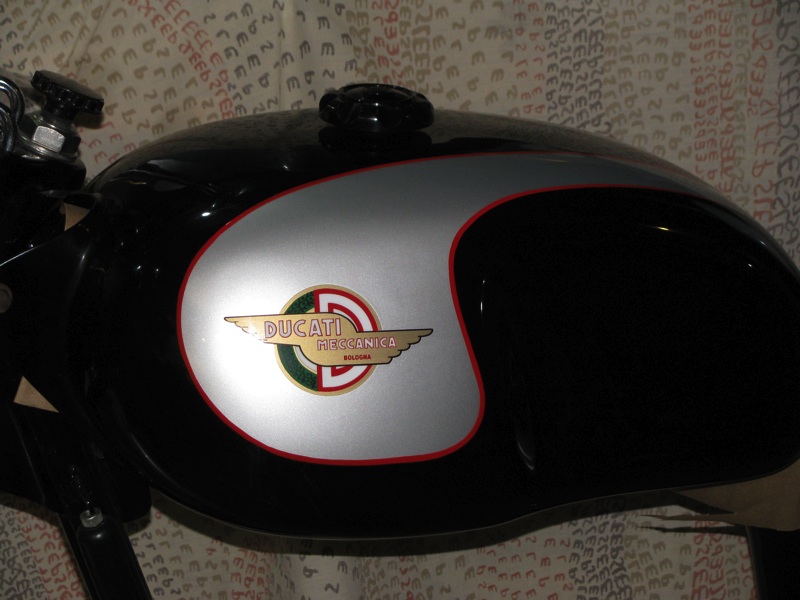
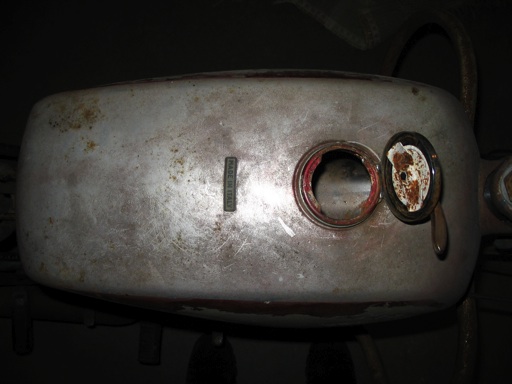
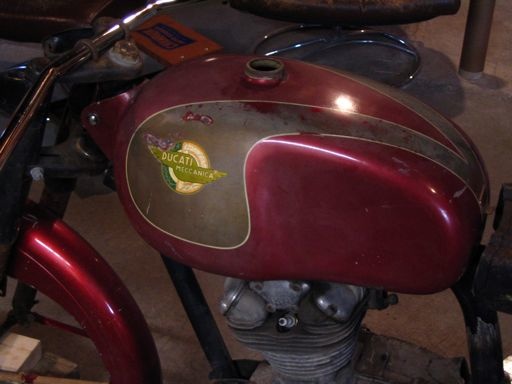
Ducati Mach 1 tank, or so I thought. Turns out it was off an early Sebring.
Image

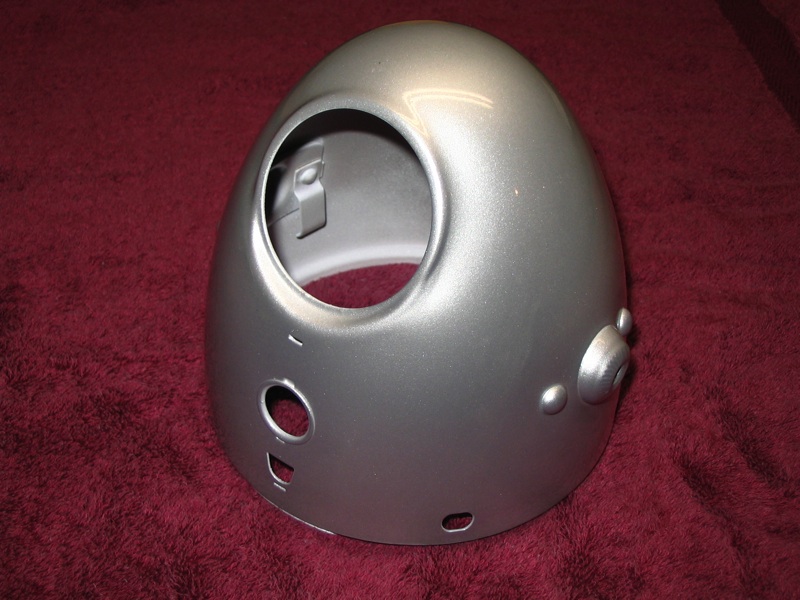
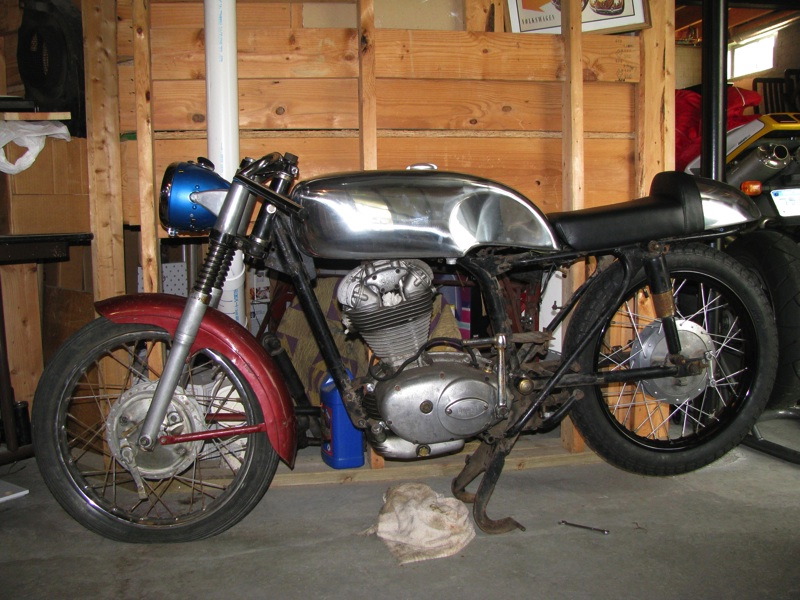
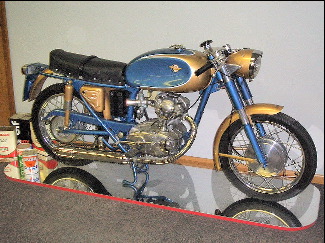
I wasn't sure what bodywork I was going to use on these but I knew it would be rounded vs the squared off stuff they came with. Most people agree that look wasn't a high point of Italian style. Eventually I decided I wanted to build a 125 Sport replica out of the 160. I had seen a 100 Sport at the 2005 Motogiro d'Italia and thought it was pretty cool. It was the bike that convinced me I needed to stop talking about wanting a single cylinder Ducati and to actually start looking for one to buy.

Here's a picture of Rich Lambrechts' 125 Sport which provided a lot of inspiration early on:
Image

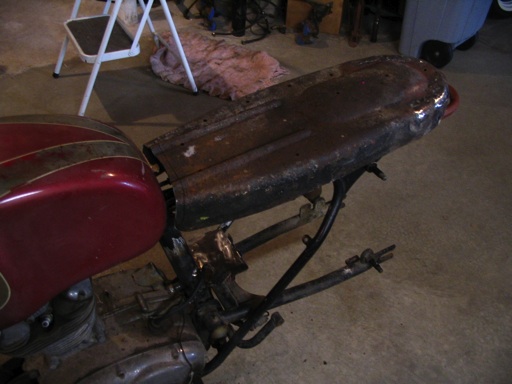
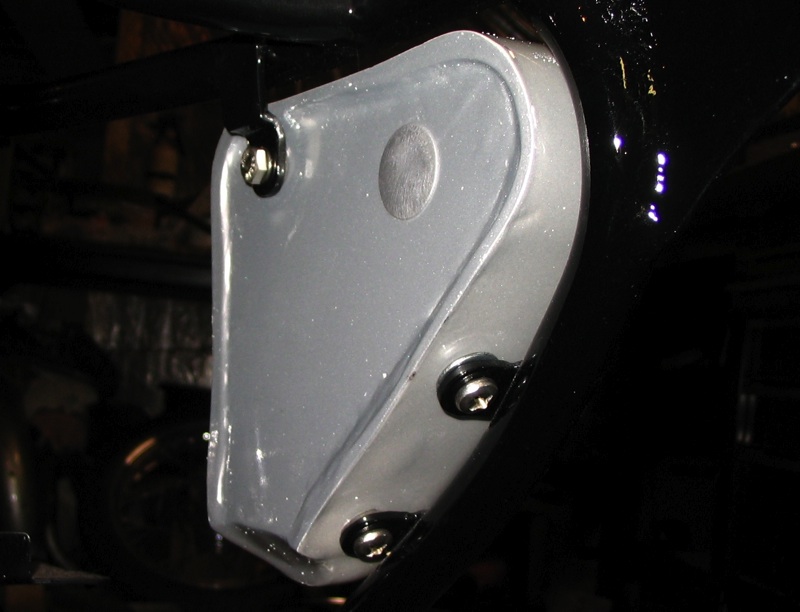
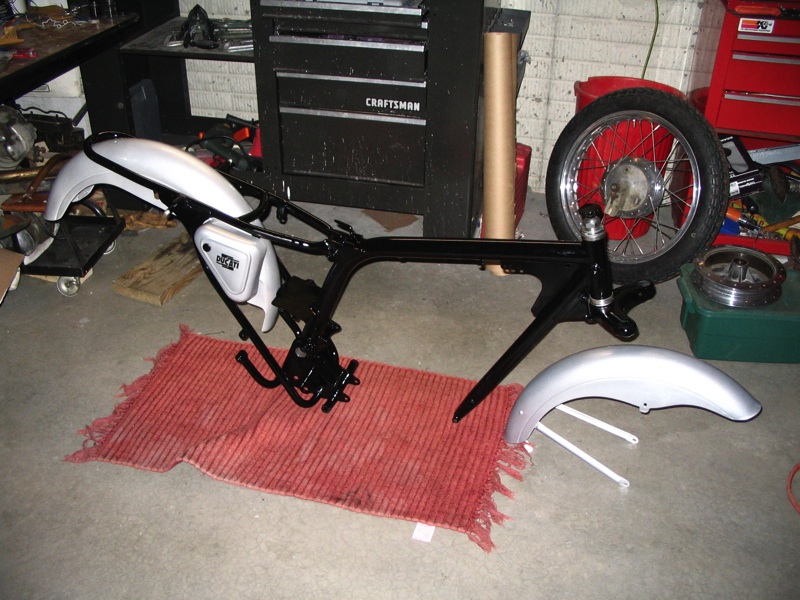
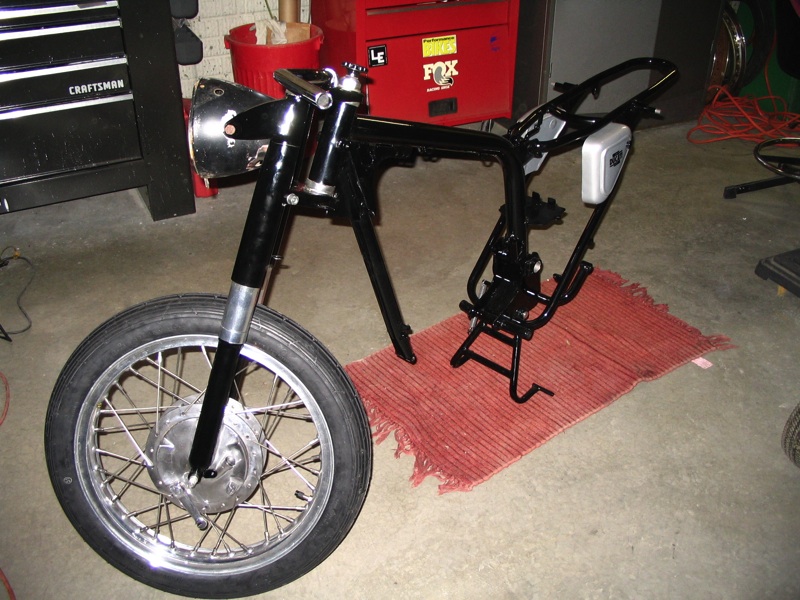
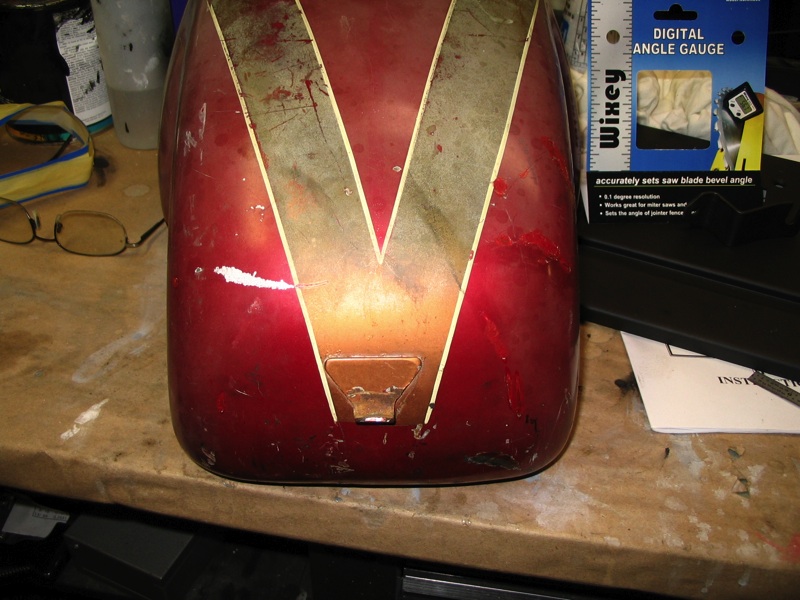
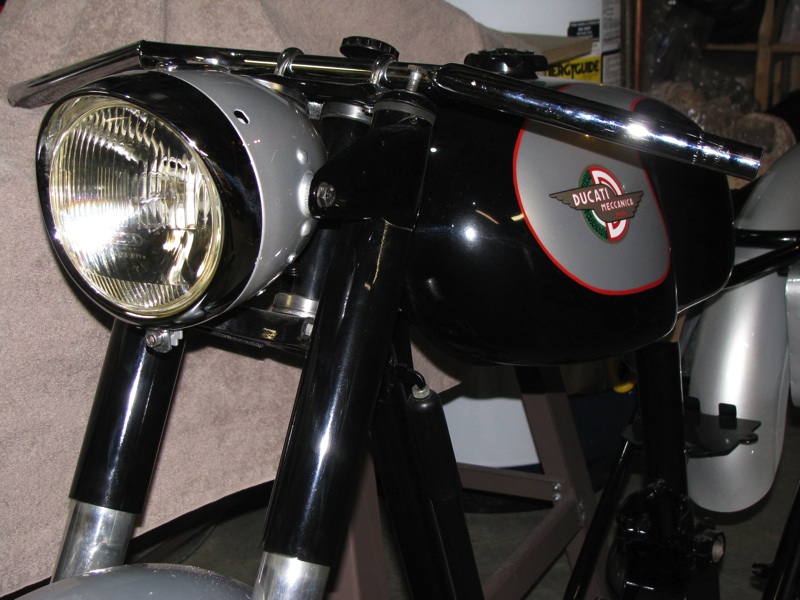
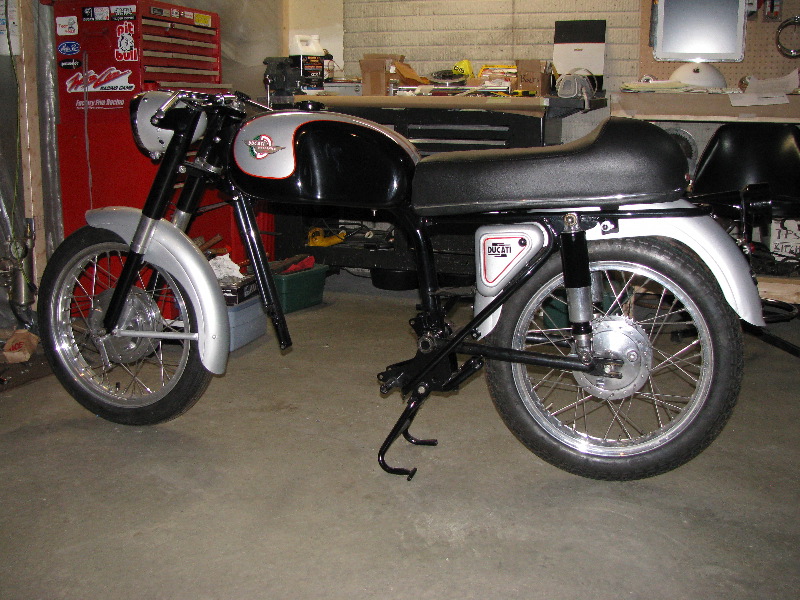
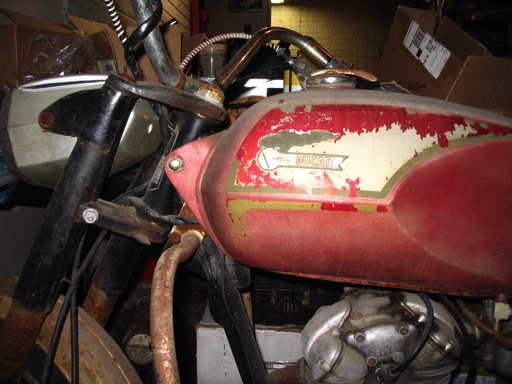
Even though the 250 was my main interest at first, by the time the 750 was on the road the 160 had become my main focus. The 250 was put on the back burner. The Sebring tank was always intended to go on the 250, but I left it on the 160 as I collected parts because I liked the shape. I wasn't planning on making an accurate Sport replica, just something along the same lines. I found a headlight, fenders, and (fake) earlier tool boxes, but my search for a 125 Sport tank wasn't getting anywhere.
Image

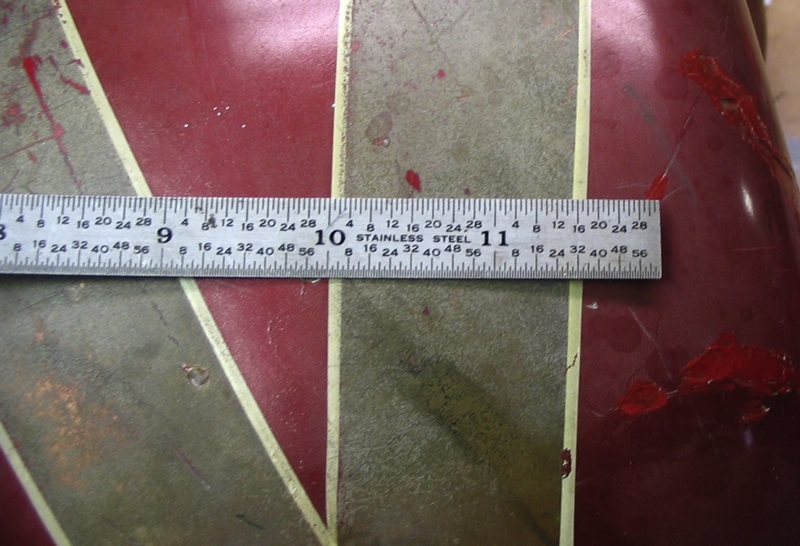
Repop F3 tanks are out there, but they look a little different than what I wanted. Maybe close enough? While I was mulling over what to do I stumbled across a nice 175 TS(?) tank, so I bought it. I'm not positive it's a TS tank, but I'm pretty sure it's from the late '50s.
Image

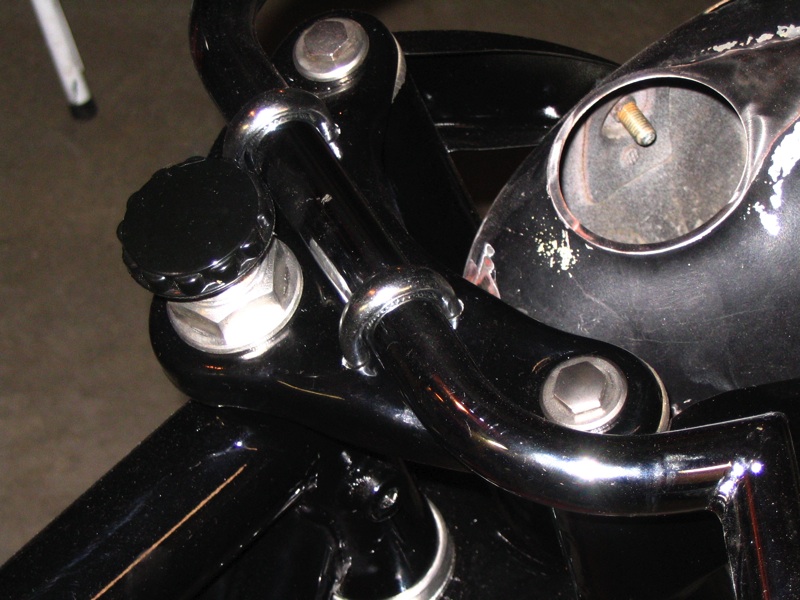
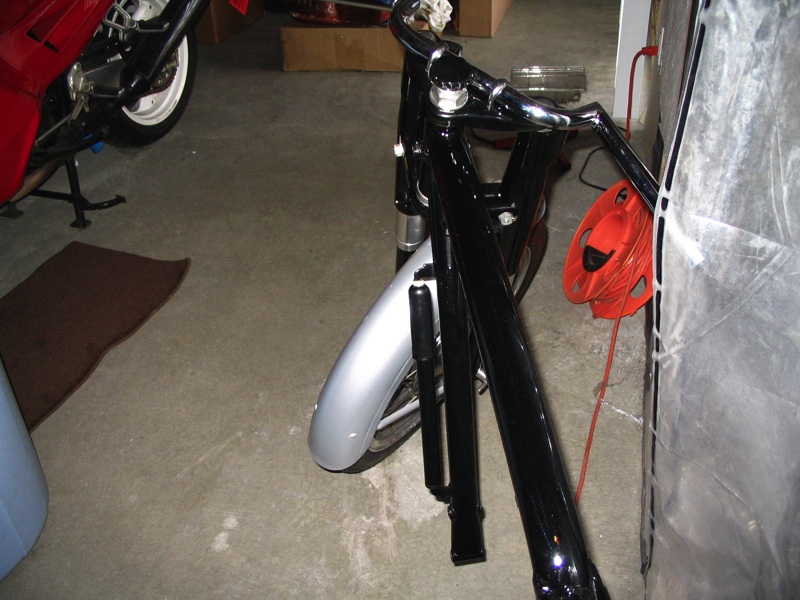
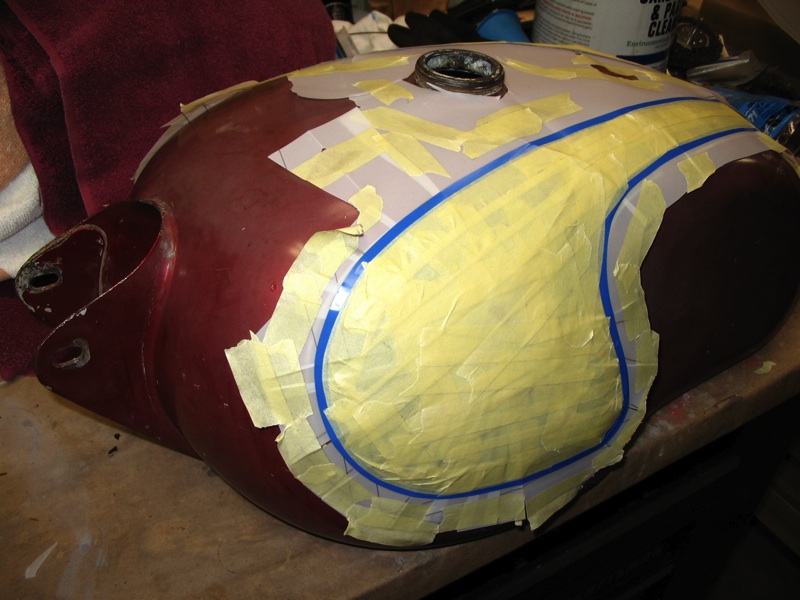
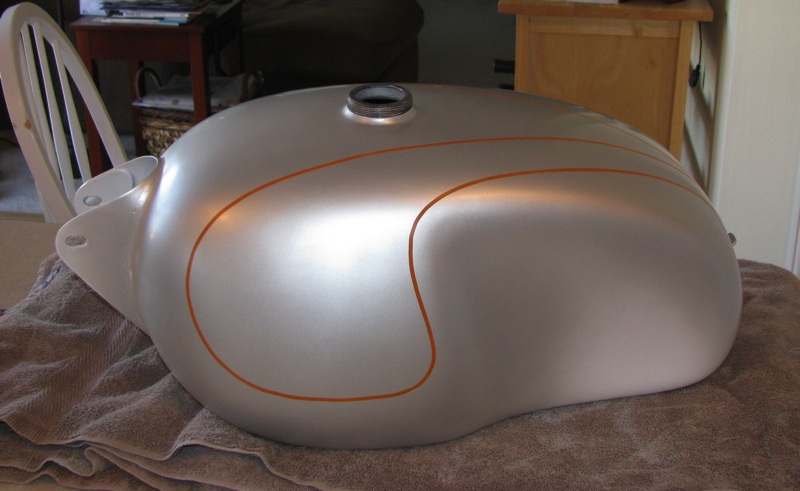
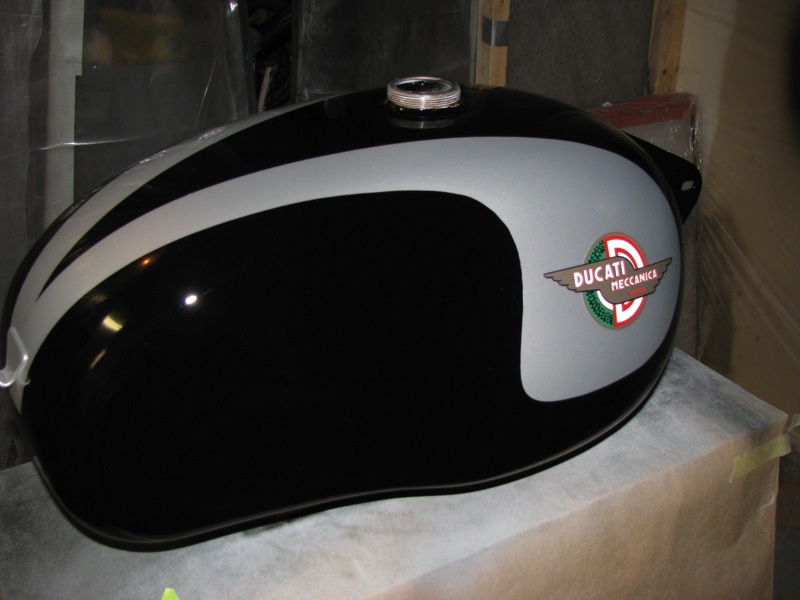
Now I had the basis for my bike. Still a lot of mods to be made, but the basics were falling into place.

DesmoDog
Posts: 166
Joined: Fri Nov 06, 2009 12:36 am

Re: 1966 160 Monza Jr re-style

Postby DesmoDog » Wed Nov 25, 2009 4:27 am

One of the first issues I ran into was the battery tray. The later Monza Jr's have a big indentation in the rear fender to clear the tray, The older rounded fenders don't have that so they won't fit properly on the newer frames. This shot is supposed to show the mounting tab not fitting but if you don't know what to look for I guess it's hard to see... look at the tab on the tray and the hole in the fender.
Image

My first attempt at fixing that was to cut and bend the tabs so the fender could move forward. I suppose that would have worked, assuming I could find a battery that fit, but I decided to copy the tray off my 250 instead. It'd look more like a Sport that way. I made a tracing and started cutting/bending.
Image

The circular cut out on the front was off center on my tracing so I "fixed" it. Then I did a trial fit on the bike.
Image

Yeah, the tabs interfere with the chain guard. Potentially anyway. I ended up putting it in place just a tad higher than it should be and shaved a little off the tabs and it cleared the guard at full compression, no problem. But now I know why the cut out was off center on the 250! I also should have put some stiffening ribs in. it did warp a little when I put it in place. Not bad, but it's not flat either.

The next thing to tackle was the seat. The easy way out would be to buy a fiberglass tail and go with it. But... I wanted something that looked more "factory". The stock seat was just too squared off though. I took some paper and cut out a shape I liked better.
Image

Image

After spending way too much time devising numerous methods of reforming the radius on the edge of the pan after I trimmed it down, I decided to cut and paste instead. I traced the shape out on the pan (black line). While thinking about the best places to cut to get everything to match up so it could be butt welded nice and pretty, I realized there was no need to get perfect joints on this rusty tray that would end up hidden under foam and fabric. I laid out the "cut here" lines (pink) freehand and started cutting. After about two minutes of that I was just cutting where it looked to make the most sense.
Image

When the time came to form the shape, I ended up eyeballing it instead of using the template. I made a new template from the now modified side and used that to check the shape of the second side. First side shaped and tacked:
Image

I finished cutting/shaping/welding and moved on to the front of the seat. The tank I was using was longer than the original tank, so I trimmed it off and changed the profile to match the back of the new tank.
Image

Now I had my seat base and I moved on to building the wheels.

The Monza Jr came with 16" wheels. I didn't like them, and as luck would have it, some 17" San Remo NOS rims off a Benelli(?)showed up on eBay. I didn't want to go with 18" rims because I wanted this bike to look like a smaller scale version of the 250s. I bought a set of the 17s, ordered some stainless spokes from Buchanan's and polished up the old hubs.
Image

Much better than the stock rims.
Image

I had issues with my front hub so just for yucks I put the larger 250 hub in there. The spokes are way too long obviously, it's just thrown together. If you look closely you can see the nipples aren't seated and the angle of the spoke holes is off. I like the look of the wheel with that hub, but the spoke holes are too far off to tweak and I already had the spokes for the smaller 160 hub. So... it wasn't to be. Hmm... on second thought maybe the shorter stock 160 spokes would have worked? Nah, the angle of the spoke holes would still be off.
Image

Front hub fixed, I laced it up and installed tires. Then on to the toolboxes. The smaller "Sport" style tool boxes show up on eBay fairly regularly, but they usually sell for more than I wanted to spend. Instead I got fiberglass replicas from Phil at Road and Race in Australia. He also carries steel reproductions. The steel parts are functional, while the 'glass parts are just for show. In order to mount the boxes I had to cut the stock mounts off the 160 frame and weld on some new tabs. Since the fiberglass boxes don't open, I simply installed some wellnuts so I had a way to mount them. More pics of the details after it's painted but for now, the bike in roughly it's new form.
Image

Image

At this point I had to admit to myself I liked the valanced front fender too much to the cut off the panel. But the rear fender didn't really go with it? Once again Rich Lambrechts came to the rescue. More on that later.

DesmoDog
Posts: 166
Joined: Fri Nov 06, 2009 12:36 am

Re: 1966 160 Monza Jr re-style

Postby DesmoDog » Wed Nov 25, 2009 4:31 am

I decided to go with the front fender as-is, which meant the non-valanced rear fender didn't match. I mentioned this to a friend and he said he had an NOS fender that would work. He also had a Sebring to restore but needed a tank. One thing led to another and a trade was made.

Image

A taillight and some other things were involved in the deal but it was the fender I had my eye on. I had also been playing around with some colors since it was almost time to start painting, but first... another mock up! The updated rear end. I had to relocate a couple mounting holes on the fender but other than that it fit great.
Image

Image

The basic shape of the bike was done, time to start painting. (With my apologies to both you dial up users out there, I'm going to start posting bigger pictures.)

My initial color choice was pearlescent silver and pearlescent black, with gold pinstripes. I sprayed a test panel and decided that the black wasn't going to work. It looked more like a charcoal gray with different colored metallic flakes in it than a black to me. I guess I was expecting more of a black that had sort of a shimmer of other colors in it or something? Whatever, I went with a straight black instead. Again House of Kolor paints. The black was great. The silver was a pain to shoot - I'm not a pro and I wasn't expecting how unforgiving it would be. I got through it but on at least one part I basically had to start over after my first attempt. I no longer have any desire to spray a candy color!

Pearlescent silver. I'm not sure the best way to capture the color indoors, it's literally dazzling in the sunlight. (and no, that is not a run you see above the rivet on the right side. It's a reflection)
Image

I screwed up my first attempt at the fender graphics. Oops. The finish looks dull because it is. I cleared it, wet sanded it, put on the graphics, then cleared over it again. The Monza Jr decal didn't make the cut, not that it'd make sense to anyone that knows Ducatis anyway. Neither will the SS decal but so be it, I like how it looks. I probably should have had "160 TS" decals made...
Image

The fiberglass toolboxes come as closed boxes, you're on your own mounting them. I went with welluts.
Image

When I drilled the hole in the front for the knob, I went all the way through the back so I'd have a guide for a hole saw to give me access to the back of the knob for a nylock nut.
Image

I added another hole in back for a third wellnut, and then found some gray plastic plugs at the hardware store to fill the large hole. I wish I could say I planned the color and size match before I started but to be honest it was just dumb luck.
Image

And the reassembly begins!
Image

Forks are on. I was having second thoughts about a silver headlight shell so I bolted on an old black one I had sitting around.
Image

Fenders back on. Bike pushed to the side of the basement?
Image

DesmoDog
Posts: 166
Joined: Fri Nov 06, 2009 12:36 am

Re: 1966 160 Monza Jr re-style

Postby DesmoDog » Wed Nov 25, 2009 4:40 am

Typically I don't like "fake" features on a bike, but for some reason I put a few on this one. I've already shown the toolboxes. I doubt anyone has noticed but I've also shown a "steering damper".

The larger bikes have steering dampers with a big knob on the steering stem nut. I thought about putting one on this bike but in the mean time I bought a few things at the hardware store, drilled a hole in the nut, and bolted it all together. Crank the nylock down until the tension is about right and install the nut on the stem. The knob is smaller than a stock one but everything on this bike is small, so I think it looks ok.
Image


Image


I also made up a tire pump. Even the reproduction pumps for these things are expensive, so I got a cheapie generic bicycle pump off our favorite auction site and cut it to length. Added a badge decal (that barely shows up) and I was done.
Image

Image

DesmoDog
Posts: 166
Joined: Fri Nov 06, 2009 12:36 am

Re: 1966 160 Monza Jr re-style

Postby DesmoDog » Wed Nov 25, 2009 4:42 am

Progress came very slowly at this point. It was about two years from when I painted the fenders and frame to when I painted the tank. Numerous reasons for that... I'll skip the details on the junk tank I tried to save.

The first order of business was trying to copy the original graphics. The factory layout wasn't exactly an excercise in precision.
Image

I took some measurements, did some tracing, and tried to make a template.
Image

Image

Time to strip. How's this look for a 50 year old tank?
Image

Primed and sealed
Image

Silver, intercoat clear, and the lines laid out.
Image

Black is sprayed, graphics are on and clear coated
Image


And for the final touch I brought it to Ray Smith, a local pin striper.
A couple last minute decisions I'm very happy I made were
A) striping the toolboxes and
B) going with red instead of gold for the stripe.
I wasn't sure about red, gold seemed a safer choice. My wife told me I should go with red. She was right.

Image

Image

Image

I've got to say, I was pretty damn happy to have the tank done. There were a couple reasons I had put it off for two years and it was great to have finally worked through it. That milestone provided inspiration to get more work done. As I sorted through more parts I realized I had everything I needed for a headlight so I put that together too.
Image

Next it was time to finish the seat.

DesmoDog
Posts: 166
Joined: Fri Nov 06, 2009 12:36 am

Re: 1966 160 Monza Jr re-style

Postby DesmoDog » Wed Nov 25, 2009 4:46 am

I already posted on how I modded the stock pan to round off the corners, this is what I ended up with. After this I coated the top with POR15 and painted the not nearly as rusty bottom.
Image

With the pan done, I stopped by a local uphostery shop and picked up some foam to create the new seat. It was 1" thick so the seat was built up in layers. I wasn't all that sure this was going to work out well and I didn't take many pictures of the process, but it's not that complicated. First I cut the bottom layer to shape with an electric carving knife, and sculpted the places where the ridges in the pan were.
Image


This worked ok up front, but I put the rear indentation in the wrong spot so I ended up cutting this bottom piece and working on the front and rear sections separately.

For the rear part I laid out a template of the side and front views on some paper. To get the curve, I marked the starting and ending points I needed, and then took welding wire and flexed it to fit between those points, holding only the ends. This gave a nice smooth curve that could be modified by forcing the ends this way or that until it looked right. I only did one half of the front view and transferred it to a piece of wood to get a stiffer pattern. Then I flipped it over for the other side.

I cut out more horizontal layers of the foam to get a step-shaped block in roughly the shape I needed, then glued the sections together. The front profile was relatively easy to lay out on the foam with a Sharpie, but the side profile... the shape I had drawn would only occur in the center of the block. I could either cut an outside template and then try to carve by eye and keep checking, or... I could cut the block down the middle and draw the profile on each side. I took it over to the band saw and cut away.

The rough shaping was done on each half seperately. I used the bandsaw again, first cutting the side profile, and then the front, leaving myself some room for the final shaping. The foam is pretty forgiving, if you mess it up too bad you can always cut out the bad spot and glue in some new foam. Luckily it never came to that but it does boost the confidence. Once both halves were roughly the shape I needed, I glued them back together. I should have taken a picture after this step, it was UGLY. So ugly I was convinced this wasn't going to work so I hung it up for the night.

A day or two later I came back to look at it, and decided to keep going. I took the part over to the belt sander and shaped the front edge so it matched the profile I had drawn out. Then I shaped the center section so it looked relatively smooth. That worked out better than I had expected, so I started sanding away until it was smooth. Once it was close to what I needed, I fit it to the base and glued everything down.

Image

Then came the top layer, which I curved up over the face of the bump to get a nice, flat surface. Once that was fit and glued down, the entire mess was brought over to the belt sander and the final shaping was done. It isn't perfect, but it's close enough! (These pics are from before the final shaping was complete)

Image

Image

Off to the upholstery shop where it was covered in another thin layer of foam, followed by black vinyl. The recovering worked ok but it revealed a mistake I made in shaping the foam. I put a gradual curve between the seat base and the front of the bum stop. There's no good way to make the vinyl follow this curve - it would have been better to go with a sharp edge. Also, I made the hump too big. The seat looks too massive on the bike and to be honest, I'm not entirely happy with it.

I came very close to tearing off the new cover and shaving off the hump, but decided to follow through on my initial plan and add side trim and a badge on the back. I reused the trim off the old seat - polished, then cut and reshaped to fit. The tape is a guide to show where to punch holes in the cover and drill through the metal pan. (The trim strip hasn't been tightened down yet in this shot - it compresses the foam under the cover just enough to fit flush with it = no gaps.)

Image

With the trim on the seat and the rear wheel in place, it doesn't look quite so bad anymore, but I think I'll still end up redoing it. I'm going to wait until I've ridden the bike though, I may decide on other changes to make it more comfortable and it makes sense to do all the mods at once. The tank and seat aren't in the right positions in this shot. Since this was taken I've raised the back of the tank, and plan on dropping the back of the seat a little too.

Image

FWIW - this is NOT a cheap way to do things. A fiberglass tail would have almost certainly cost less, especially when you add in the cost of me redoing it! If I build another bike like this, I'll probably buy a fiberglass tail. I like the fully upholstered look but it would be just as easy to upholster over fiberglass.

And that is basically how the bike sits now. I'm hoping to make progress but we'll see. I did leave out details on where I'm at with the engine - I made one significant mistake when I tore it down. I'll probably wait until that's repaired before posting. The repair has been slow so I won't give any estimates on how long that will be.

I've also got another project vying for time so that's slowing me down too. This one is the culmination of about 12 years of saying "some day I'm going to build a bike with bodywork by Evan Wilcox". Turns out that bike is a 1966 250 Monza that is becoming a 350 Bitsa. Here's a very rough shot of it - most of the details are wrong but this is the basic idea;
Image

Wheels are wrong, fender is wrong, shocks are wrong, headlight likely won't make the cut, the clubmans are already off...

DesmoDog
Posts: 166
Joined: Fri Nov 06, 2009 12:36 am

Re: 1966 160 Monza Jr re-style

Postby DesmoDog » Sat Aug 07, 2010 9:22 pm

Woo Hoo! Some long awaited parts have shown up for this so I can get back at it. I just realized I didn't post any pics/info of my mistake that led to such a long lay-off... long story short I broke the kickstart shaft boss out of the case and had to have it repaired. Here's a post I made yesterday on the adv riders forum... I'll add more info later.

I thought I took more pictures of the engine teardown but I don't have many! I guess breaking the boss took the fun out of it so I put the camera away and worked in the shadow of my shame?

Here are a few of the pre-break condition. I'll have to remember to take more as it goes back together.

Notice how convenient the kickstart shaft is in relation to the clutch basket. This is a fragile area for narrowcase engines... do NOT use this shaft for anything other than holding the kickstart lever. The bosses are known to break even under their intended use.

Image


Image

Image

And that, I'm afraid, is the last of the pics I have of the engine teardown.
Last edited by DesmoDog on Sun Aug 08, 2010 12:20 am, edited 1 time in total.

DewCatTea-Bob
Posts: 2897
Joined: Sun Nov 01, 2009 10:53 am
Location: Near SE side of Lake Michigan

Re: 1966 160 Monza Jr re-style

Postby DewCatTea-Bob » Sat Aug 07, 2010 10:55 pm

" The rear mounts are what give the "narrowcase" it's name.
See how narrow it is relative to the case?
On a later "widecase" bike, these bosses would be about the same width as the case itself. So... the whole "narrowcase/widecase" thing is a bit misleading. The cases themselves are the same width, it's the engine mounts that are different "

____ If there are any other old-DUKErs besides myself who were aware of the updated/w-c changes back when the wide-case models came-out in 1967, and have already read that quoted-wording,, THEY probably just don't much care to risk riling-up the author's ire/temper, to bother with correcting that mistaken-conclusion, but I myself feel the need to counter-state that wording, so that any other new-boys don't buy-into that misinformation, as well.
__ Now while it's certainly true that most all of us note the width of the rear motor-mounts in order to most quickly tell the difference between wide-case & narrow-case models, THAT difference actually has little to do with why the newer/larger DUKE-motors earned their name of 'WideCase' ! ...
__ We all must realize that there was never any such name as 'NarrowCase' before the wide-case motors came to be,, and at first, w-c motored models were called "Wide Deck" models (due to the wide deck of the motor-case behind the cylinder).
That was due to the newer crankshafts being wider, and so thus the motor-case -(left-case) had to correspondingly be widened as well ! _ (The w-c & n-c cranks are not interchangeable due to that difference!)
And so by the '80s, the name 'WIDE-case' came to stick as the common name for differentiating the newer/wider models,, and then therefore the only reason for calling a non-widecase model a "narrow-case", is so as to more conveniently allow reference to non-widecase models !
And so we all should now also understand that the 'narrow-case' name should actually only be applied to just non-widecase 250 & 350 models, since they are the only two sizes that were produced in both n-c & w-c versions.
Thus it ought to be disconcerting when any of the new-boys refer to a 125/160 or a 175/200 bevel-DUKE, as a "narrowcase" ! _ As those models were never called by that name (before), and still shouldn't need to be referred to as 'narrow-case', (except perhaps amongst the new-boys of us) !
__ I had next to no influence on the use & adaptation of either of those two terms, (otherwise some of us might be saying "wide-deck" & "old-deck", these days), and I'm quite fine with the WideCase-name. _ However, I think "narrowcase" would've been best used for the 4-speed cases, since they are indeed somewhat narrower (internally) than the 5-speed (non-widecase) version. _ And the 250/350 non-widecase models really should've then gotten some other more suitable name, (like pre-widecase, or small-case, or light-case). _ (BTW, I think the 125/160 motors ought to be called 'reduced-case'.)
But there's no going-back now, we're stuck with 'NarrowCase' !
__ So anyhow, please keep in mind that the NarrowCase-name was never earned by any model because of it's "narrow" rear motor-mounts or narrower left-side motor-case, or any other such related pre-existing reason, (any time before the WideCase-name came into being) !


Dukaddy-DUKEs,
DCT-Bob
PLEASE NOTE... If this-post is not-yet signed-off with '-Bob', then I'm still in the process of completing it,, and if not also included with 'DCT' near bottom as well, then I may edit this post's wording at a later time. - Dct.Bob

DesmoDog
Posts: 166
Joined: Fri Nov 06, 2009 12:36 am

Re: 1966 160 Monza Jr re-style

Postby DesmoDog » Sun Aug 08, 2010 12:19 am

DewCatTea-Bob wrote:" The rear mounts are what give the "narrowcase" it's name.
See how narrow it is relative to the case?
On a later "widecase" bike, these bosses would be about the same width as the case itself. So... the whole "narrowcase/widecase" thing is a bit misleading. The cases themselves are the same width, it's the engine mounts that are different "

____ If there are any other old-DUKErs like myself who were around when the wide-case models came-out, and have already read that,, they probably just don't care to risk riling-up DesmoDogs's temper to bother correcting him, but I myself feel the need to counter his incorrect conclusion, so that others don't buy into it as well.
__ Now while it's true that most everyone uses the length of the rear mounting-bolts to most quickly tell the difference between wide-case & narrow-case motors, that difference actually has nothing to do with why the newer-type motors earned their name 'WideCase' ! ...


Well, there ya have it. I either misunderstood or was given incorrect information...

In any case, no pun intended (yes it was), if you want to know if it's a widecase just check out the rear engine mounts.

I have edited the orignal post to remove the offending verbage...

bettyann
Posts: 57
Joined: Fri Feb 05, 2010 1:21 am

Re: 1966 160 Monza Jr re-style

Postby bettyann » Sun Aug 08, 2010 3:09 am

You know,I've seen a lot of pictures of old Ducati racers and works racers, some of those 50's factory racers had wide mounts like like late wide case 250-450 motors, they must have used old wide mount technology, later to stiffen motor/frame rigidly.
Capt Paul


Return to “Ducati Singles Main Discussions (& How to Join)”

Who is online

Users browsing this forum: No registered users and 49 guests